Wednesday, 28 February 2018

An Easy Way to Paint Small Areas

You are going to learn two things about this post. One, I can procrastinate with the best of them, and two, our refrigerator probably almost qualifies for antique status. However, This post gave me an opportunity to find an easy way to paint small areas without making a huge mess and share it with you.

(This post contains affiliate links)

I recently did a post for HomeRight on their site about their HomeRight Quick Painter Pad Edge Painter. I was looking for places that I could use it, and I realized that there was a spot in my kitchen I had been putting off painting for almost a year. Yes, a year.

Upainted area over fridge

When we repainted our cabinets and did a mini-kitchen makeover, LAST FEBRUARY, I re-painted the walls. I did of the walls except for a really small area over the fridge, which I totally forgot about. I had put everything away, brushes washed, and then I looked up, I almost cried. I struggled with just pulling everything out again to paint it, but tiredness and laziness totally won out, and  I let it go, thinking I would tackle it in the next week (even though it really looked bad.).

So you know how there’s one little detail on something you miss, and then whenever you see it , it makes you mad, but not mad enough to do anything about it, because you really don’t feel like it? Let’s just say every time I noticed it for THE NEXT YEAR, I cringed, but was still too lazy to do anything about it. The HomeRight QuickPainter was a great way for me to stop being lazy and finally do it!

Paint edges easily with a QuickPainter, and easy way to paint a small area without making a huge mess.

I also learned it’s really hard to take a picture on top of the refrigerator in bad lighting, but I wanted to show you how the QuickPainter worked as an easy way to paint small areas.

QuickPainter for small areas

What I liked about the QuickPainter is all of the paint goes right in the painter, and squeezes out through the pad. Since I wasn’t all about taping and drop-cloths, that worked out pretty well for me. I didn’t have any paint drips or splotches.

Paint on QuickPainter

I like how it squeezes out right onto the pad. Clean up wasn’t any different than having to wash out a brush either.

Painted wall after using QuickPainter

I have to admit, it was so nice to have it finally done!

Fridge area after painting area above

It looks so much better!

I know a lot of bloggers (and most normal people) have fancy fridges, and it’s not that I’m not a little jelly, but we still have the same refrigerator that came with our house over 18 year ago, which is why I don’t really share it in pictures too often. It’s pretty much a dinosaur. It was here when the people before us bought it, so it’s at least 25 + years old. She does still run like a champ though!

Painted area over fridge with cabinets

We’ve talked and talked about upgrading, but one, like I said, she still runs, and two, with the cabinet configuration, we’d have to either get the same size to put it in the same place,or we’d have to figure out something else. Since our kitchen is only 11 x 12, it limits where we can put something larger. I know it’s not a very sexy fridge, and I’ve even toyed with painting it. One of these days, its either going to totally die, and then we’ll be forced to make a decision, or, I’ll finally get sick of the broken drawer inside, and we’ll bite the bullet. Now, you know our deep, dark, kitchen secret, and how to easily paint a small area!

This post was sponsored by HomeRight, opinions are my own.

The post An Easy Way to Paint Small Areas appeared first on Jennifer Rizzo.


from
https://jenniferrizzo.com/2018/02/easy-way-paint-small-areas.html

Tuesday, 27 February 2018

An easy and custom DIY headboard (I did it again!)

Well hello! It's about time for some DIY up in here! I'm in the mood to start tackling the bigger projects in this house and this was a good start!

You may remember our son's room I shared last week:
red and blue boy room

I told you then I have big plans in here -- especially on this wall. The first thing I wanted to get finished was his headboard, for comfort reasons and just because it's one of the easier projects. ;) He had one in the old house but the fabric was bleached from the sun. We knew we were getting him a bigger bed too. 

I've been making my own headboards before this blog was a twinkle in my eye...this is a totally doable project, even for the novice DIYer. I promise! I shared a very detailed tutorial years back complete with a list of the items you'll need -- be sure to check out that tufted DIY headboard post here. I will go through the basics in this post but that one is more detailed. 

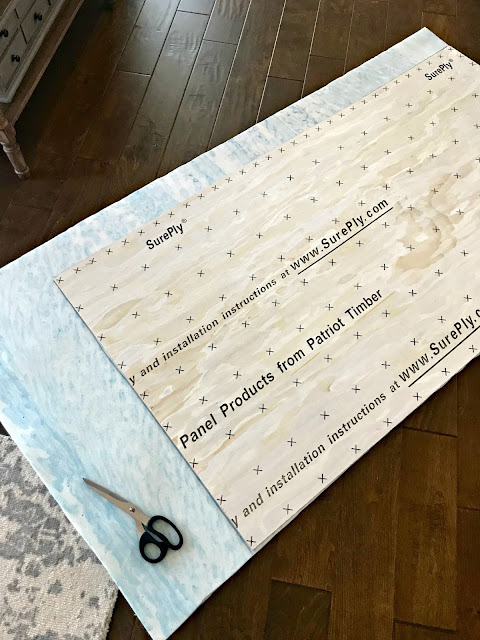
I spent $20 on a piece of 4x8 wood at the hardware store, and then had it cut down to the size I needed for the headboard (they will do it there). I can use the remaining pieces for future projects (already have one in mind). I had this cut to 32 by 60 inches:
How to make a custom headboard

This stuff is pretty thin -- I usually go with something thicker, but I realized there's really no need. This was even easier to work with too. 

Foam from the craft store is NOT cheap. However the egg crate toppers you get for the bed aren't too bad for smaller sizes, so I always use them for this project!:
Affordable foam for headboard project

I ordered from Amazon because I didn't feel like going to the store again. ;) This is what I used and I was VERY happy with it. Leave it out for a good hour or two to fill up and get it's shape. I spent $20 on this but have some extra I can use for a bench. (Side note -- it feels like the stuff they use for the squishy toys. You know the stress ball things? I may have to DIY a few with my scraps!) 

Lay your board on top and then cut out the size you need: 
Headboard tutorial -- easy DIY project!

I doubled up on our king headboard to make it extra cushy, but I was using really inexpensive foam (you can find these for cheap at back to school sales -- they go on clearance after college starts). This one was plenty soft as is. 

Quick tip:  If you do choose to go with thicker foam from the craft store, you can cut it like buttah with an electric carving knife. ;) 

I had some scrap muslin for this part, but any cheap fabric will do. Don't spend a lot here. You'll start wrapping your board (with the foam on the other side -- bumpy side facing the board):
How to make your own custom headboard

I used a staple gun I've had for years. I actually bought plug in version years ago but this works WAY better in my opinion. You gotta put some muscle into it but it's cheap and I've used it countless times. 

I forgot to share this part, but I happened to find some extra batting I had as well, so I ended up using that over this muslin. Batting is just another layer to make it softer and it also softens the edges a bit too. (More of a concern for your fabric if you use something thin that may break through at the corners eventually.) I cut down the corners on this wood ever-so-slightly so they weren't super pointy. But it's not necessary. 

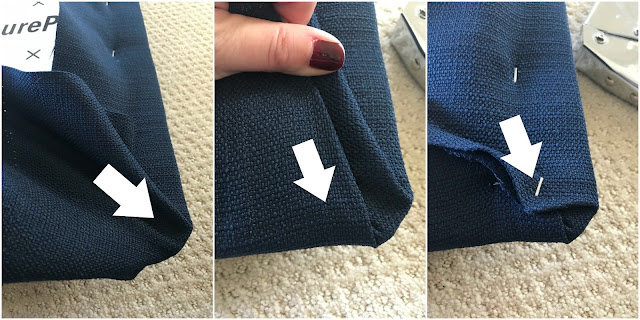
The corners can be tricky sometimes, but you start by pulling the fabric back in the middle, secure with the staple, then pull one side over and secure, then the other:
How to cover corners on headboard

Cut away any excess fabric after you add a staple. I don't recommend cutting away before you start a corner, just in case you cut it too short. Then you're kinda screwed. ;)

I shared how to (very easily) cover buttons yourself in that original post as well. They just add a nice, inexpensive detail:
How to cover buttons yourself

The tufting part is easy too -- the only difficulty comes in figuring out where you want your buttons. I go over that process as well! 

I went with four buttons on this one because the top is the only area you can see when the bed's made. Pick your battles folks! I added more to our master headboard but that one is bigger:
Custom navy tufted headboard

I just had a thought that I may add four more to the bottom so I can flip this eventually and prevent the sun damage on this deep color. 

Hanging a headboard is easily the hardest part! I attached D-ring hanging hardware to the back -- three across the back at the same distance from the top. Then I used a level to mark where the rings were to hang it: 
Custom navy tufted headboard for boy's room

I purchased nailhead trim to use around it, but thought it looked great without! So that will go back. I have more plans for this wall so I may add a wood frame around it later:
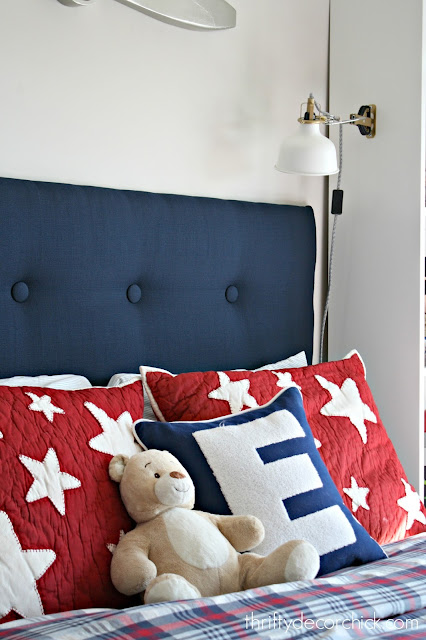
DIY headboard with lights above bed

I love how tall it is! I went a bit bigger than I originally planned and love it. It will grow with our boy. :) 

The red and white bedding is from Pottery Barn Kids but they don't sell it anymore. I did find this star bedding option which is even cuter (love the stripe underneath) and for sure cheaper. Kind of love that one. They have it in blue too. (It's on sale right now.) I can't remember where I got the duvet cover but I think it was HomeGoods. 

The sheets are from Target and are super soft and also on sale right now. They are a really fine navy stripe: 
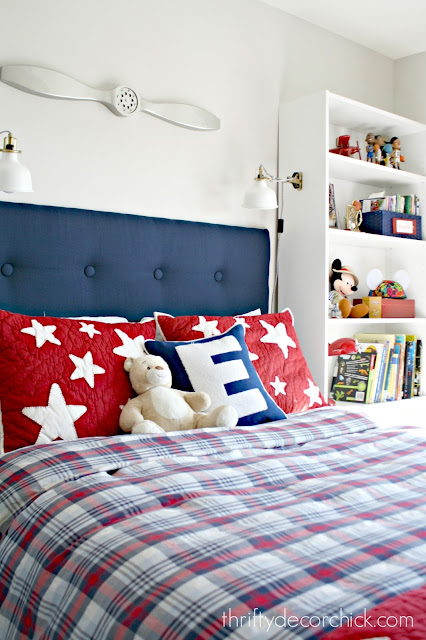
Bookcases around bed with lights

Can't wait to tackle the other projects in here! This is a great start! I did the whole thing for less than $70 and it's the exact size and fabric I wanted. (His bed is a queen size.) Plus I have extra wood, foam and fabric to use for other projects. I did look into some headboard options online but they were at least double the price and were all so thick! His bedroom isn't huge so I didn't want to take up even another five inches. 

Here's a reminder of how this space looked last week:
Bed between bookcases with lights

By the way, yes the lights are different heights. I still need to fix that! 

And how it looks with a custom DIY tufted headboard! Be sure to check out that link for more detailed instructions if you want to tackle this one:
Custom DIY tufted headboard for boy room

You know what's cool? That original post has been viewed more than three million times! Wow. And when I was looking into ordering the foam mattress topper I saw that someone used the same stuff to replicate our master headboard. (They added a pic and it looked GREAT!) That just tickles me to no end -- how fun. 

If you have any questions let me know! Again, make sure to check the tufted headboard tutorial for all the details. 

Affiliate links included for your convenience! 

SaveSave

from
http://www.thriftydecorchick.com/2018/02/an-easy-and-custom-diy-headboard-i-did.html

Monday, 26 February 2018

Ten beautiful printable works of art!

Hey there everybody! I can feel it coming...only about three more weeks till spring!! I don't even mind the winter -- I quite like the cozy days and nights the cold weather brings. But after the crazy back/health issues I had over the winter, I've never been so ready for fresh, spring weather and all of the beauty it brings! 

It truly feels like a new beginning for me this year and I can't wait! Our weather has been pretty mild for the past week so I've had the windows open quite a bit -- just the fresh air affects my mood for the better. 

As I do a few times a year, I've gathered ten beautiful printables from some talented bloggers and this time they are spring-themed. I think you will love them! I talk about printables a lot because they are SUCH an easy and inexpensive way to add some seasonal decor to your home. They make great little accents or you can create an entire gallery wall with them. All you pay for is the paper and printer ink. ;)

Here we go! I link to each one under the photo -- make sure to visit each site for the high resolution images to download. This one is a favorite -- I just adore this sweet print Julie created:

Lauren shows you how to create a wall of art for next to nothing with her spring prints -- of course you do need the frames. But otherwise it's an inexpensive project!:

I LOVE these herb prints from Kati -- these would totally work all year in the kitchen. I'm trying to figure out where I can add these in ours:

I love the bright pink in this sweet print Rachel created:

I really like the simplicity of the fern leaf print that Monica created too. If your taste leans more modern this is perfect!:

Goodness, this one from Katie is another favorite -- just so pretty and lovely. Great for a pop of pink in a room:

This one is the cutest!! Jenny suggests this one as a computer screen saver too. Precious!:

Now this one from Susan is awesome -- if you're going to spring clean your house, at least you can cross off a beautiful list! I already printed mine out:

Alicia's dainty printable is another lovely option:

And last but not least, the Lolly girls created this beautiful water color option as well:

A simple search for free spring printables will give you hundreds of additional options! These would be lovely here and there through the house or layered leaning against the wall on display.

I will continue to sing the praises of the printable and we're lucky to have so many talented bloggers sharing these with us for free!

Have I convinced you to use these around the house yet? ;)

from
http://www.thriftydecorchick.com/2018/02/ten-beautiful-printable-works-of-art.html

Saturday, 24 February 2018

Flu Fighters

Well, the flu finally hit our house. We are officially the “flu fighters”. If you’ve been following on IG or FB, you know we’ve already been in quarantine for a few days.

Having a group of tweens over for a sleep-over, during flu season, seemed like such a great idea a few weeks ago. Two days afterwards, I was rethinking that decision, as Little spiked a 102 degree fever, and started hacking like crazy. Then Oldest started. Luckily, (so far) Middle has stayed healthy, and wasn’t here for the sleep-over, so she spent a few days with my mom.

Kitchen subway tile with gray and white scheme in kitchen, with kilim rug and vintage chandelier #kilim #subwaytile #whitecabinets

I feel like my kitchen will never be this clean again. At this point, the dirty dishes are marching across the countertop in protest across the stove.

I’ve had kids huddled in blankets the last few days,with humidifiers and steam showers running. I normally don’t run to the doctor for everything, but with Little’s bout of pneumonia, I wasn’t taking any chances, and the first day we popped over there. Afterwards, we headed home to load up on fluids,essential oil and a few other remedies, and a watchful eye.

So far, after days of high fevers, they are finally subsiding, but still have lingering coughs. I am keeping  close eye on them, since pneumonia seems to be a real threat behind this flu. Even though my kids are older, I still get so nervous when their fevers get too high. At one point we hit 104.3 and I started to get a little worried. Luckily, we were able to bring it down.

I feel like I’m out of the loop at the shop too, since I’ve been home since Wednesday. I worked a bit from home, and I’ve been downing ACV in water, probiotics ,sanitizing,and anything else I can do to keep myself healthy.  I might also be medicating with a little Gin drink (I figure if it worked for the settlers in the old timey-days,it can work for me too.). I’m tired, but the upside is, the exercise I’ve gotten going up and down stairs for the two sick-os over 4 days has really toned my buns. Winning.

Cheers to gin and raspberry

So, we’ve almost won the battle (fingers crossed), and are officially “flu fighters”. Everyone is a little more “chipper around here,” and is starting to finally feel hungry… and they are starting to fight again. All good signs. I’m always thankful and feel incredibly grateful for good health.

I hope your home is staying healthy, and you’re able to avoid this nasty flu. Spring can’t get here fast enough!!


The post Flu Fighters appeared first on Jennifer Rizzo.


from
https://jenniferrizzo.com/2018/02/flu-fighters.html

Wednesday, 21 February 2018

What I have I done in four months?

Well hello! Long time no talk! I had the flu this weekend -- thankfully not as bad as most. I was over it pretty quick but took it easy for the remaining long weekend. Then our boy had some minor sickness as well, so needless to say...I got very little accomplished. 
I have SO many big projects planned...I was going to start one over the weekend, but I hope to get going in a day or two instead. Since we've now been in our home for four months, I thought it would be fun to look back and see what I've accomplished in that time. So far I haven't tackled any major projects, but the little ones have really made a difference! I think it's encouraging to see that even minor DIY projects can change the whole look and feel of a room. You know I love big transformations but my focus has been on getting things organized and functional.

If you you're been around here for awhile you know once I figure out the way I like accessories, they stay that way for a long time. I've already moved stuff around quite a bit though, and I expect that to continue as I get a better feel for how I want rooms to look.

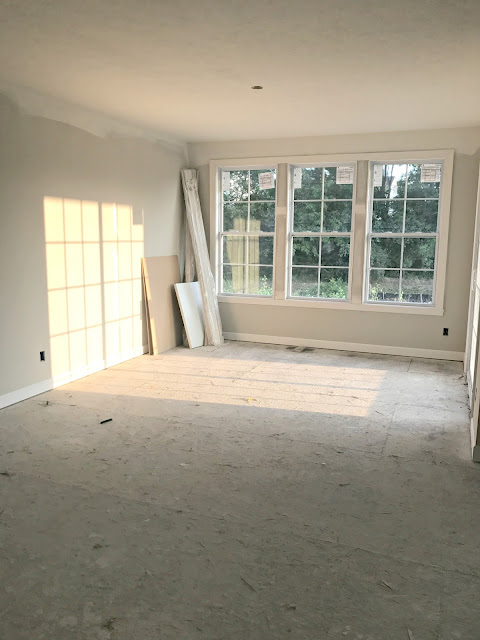
Here's a before of our dining area, the room I'm now calling our "morning room" because it just sounds lovely (and that's the best time in this room anyway):
"Morning room" eat in kitchen

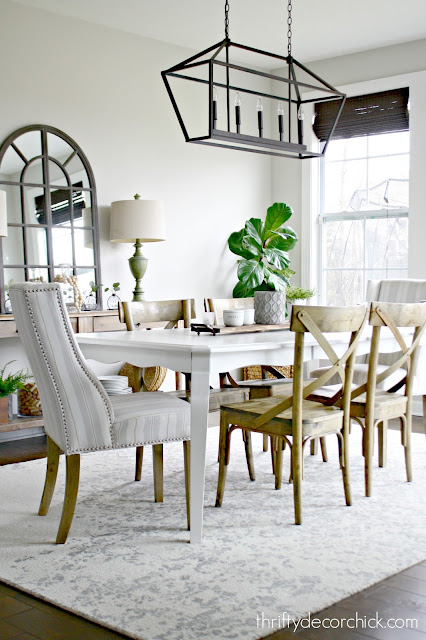
I shared the full tour of this dining space a few months ago, but as you can see I've changed out a few things:
Pretty dining area with wood and white furniture

I found a long, pretty wood tray at At Home and layered items on it. The table centerpiece is something I'm ALWAYS messing with -- but I really like this! I have a big candle, herb plant, some votives and salt and pepper on the tray.

I found that mirror for the master bedroom but brought it in here and just fell in love! Now I want another one for the master. ;) I'm on the lookout for art or something to fill the wall space on either side too. 

Speaking of the master, if you missed that tour you can see it here. This is how this view looked the day we moved in:
Bedroom with bed between two windows

I remember being so thrilled I was able to find the box with our sheets! :) 

Here's the progress so far -- hanging window treatments and FINALLY finishing those nightstands made a big difference!:
Master bed between two windows

As I said in that tour post, I'm still looking for something over the bed. Nothing has hit me just yet. 

One easy project that was pretty quick (and made this house feel even more like home!) was the big chalkboard I put in our mud room
Huge chalkboard DIY on wall

I will forever love chalkboards. I LOVE the placement of this one! I use it more than any board we've ever had. I love the size and that I can jot down stuff as I come in the door or leave. 

I've mentioned that I've been asked many times what I'll do with myself in a brand new house. Projects like that chalkboard are what make a house a home -- little details that add fun and character!  Just like our old house, I'll be adding and layering to give this house that same feel. 

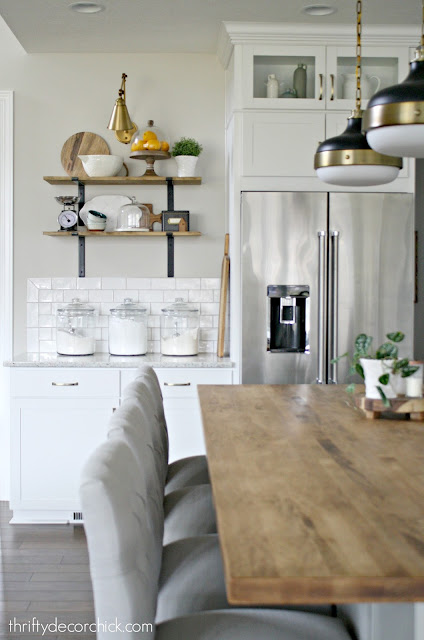
I added a light on this kitchen wall instead of the cabinet that was supposed to go here:
Jars with baking ingredients in kitchen

You can see how I hung the shelves and the materials I used in this post! I've changed things up just a bit:
Open wood shelves in kitchen

I had our everyday dishes on there like I did in our old kitchen, but in that house the shelves were right in the middle of the kitchen. Here they're further away from the dishwasher, so we figured it's easier to keep dishes in the cabinet. Instead I put some of the items I use most often up there -- a mixing bowl, serving bowls, recipe box, etc -- along with some pretty stuff. 

You can see how I stained and treated our butcher block island countertop if you missed that project. It's holding up beautifully, even with the sink!

We LOVE the windows in our great room but we thought for sure it would crazy expensive to add window treatments and hardware. You can see how I did it for a great price in this post. Here's a look from the stairs:
Affordable window treatments for tall windows

I love this view! I still plan to move that drape over a bit so it's not crowding the table. 

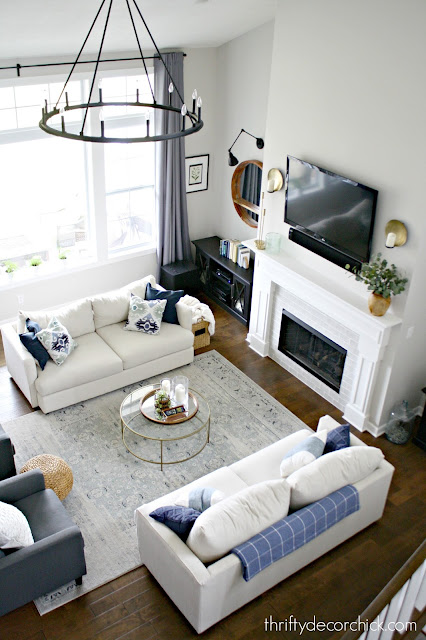
I feel like all I've done is hang things. 😂 Drapes, art, mirrors. Lights. But again -- that's the stuff that makes a BIG difference! Here's the great room before we moved in:
White fireplace with gray tile surround

Here it is with the drapes, mirrors and furniture from the upstairs:
Symmetrical great room layout with two sofas

I have matching pillow covers coming this week and I'm excited about those. You can see more about the consoles on either side of the fireplace here and more about the furniture layout I ended up with here. 

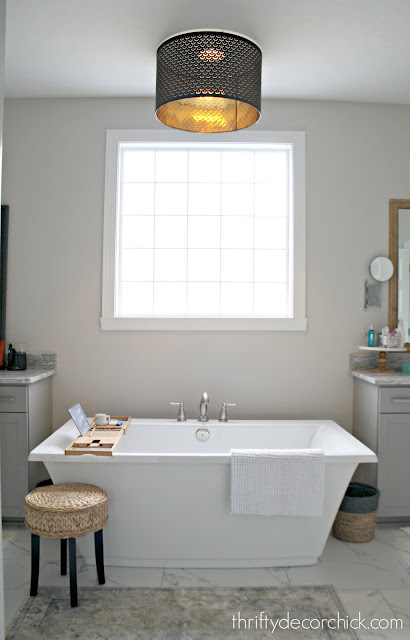
I've hung a few lights so far and I talked about a couple of them last week. If you missed the one over the tub, check out this post!:
Safely hanging a light over a tub

I hope to share more of our master bathroom in a week or two -- I still don't have the mirrors hung. I went back and forth on what I wanted to do, but now I think I've got it figured out. :) 

Here's a before picture of the little hallway off our kitchen:
Five paneled interior doors

And here's that view now, with a gallery wall around the thermostat and the light I was able to hang from a recessed light fixture:
Hanging a light from recessed light

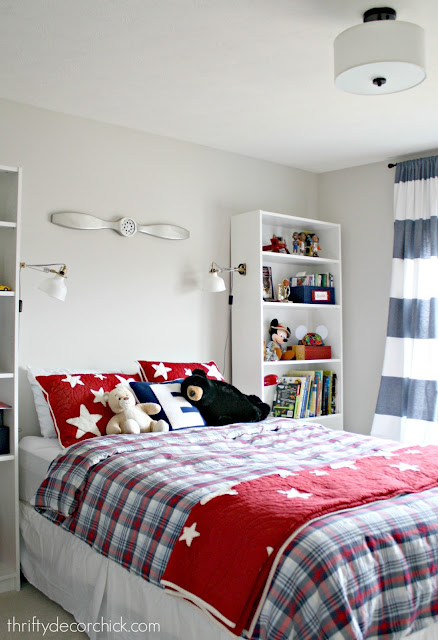
I finally got the light for our son's room up too. (There's a link to it here.) It's a little smaller than I thought it would be, but I like it and it was easy to hang:
Red blue and white boy room

We have BIG plans for his room. That wall around his bed is going to be a really cool focal point when I'm done with it, and we'll have a tad more storage as well. 

I've also installed five dimmers so far -- I was on a roll one day a couple weeks ago. I shared how to add a dimmer in this post -- that soft light is SUCH a lovely addition. I have plans to add at least five more...you know me!

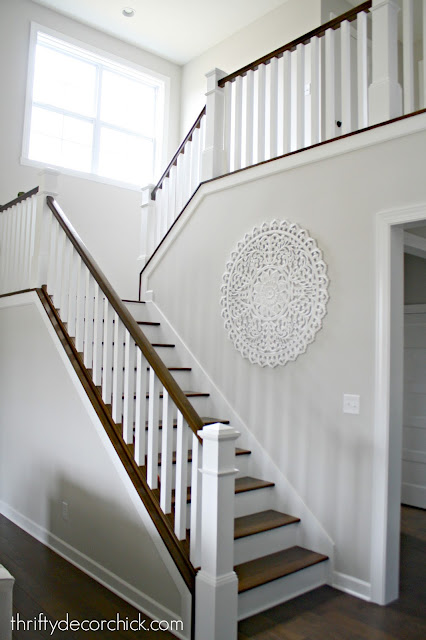
I've hung a TON of art too. I found this at HomeGoods a few weeks ago and like that it's plenty big. I also like that it's a circle -- with all those straight lines this wall needed it:
White and stained stairs with balusters

I'd like a little more contrast though, so I'm thinking about giving it a wash of darker color. We'll see! I envision prom pictures on these stairs someday! 💗

I didn't have mirrors installed in our bathrooms to save a little cash, so I hung these in our son's bath:
Masculine boy bathroom

I wanted something very simple and modern -- they were super easy to hang and (affiliate) only $20 each! I have plans for that wall behind the mirrors as well...eventually.

I hung a gallery wall around the TV in our master bedroom:
Gallery wall around TV

And I've started our new Disney art wall in this house...we've got room for a lot more! I have plenty of art and photos to add, we just need to get more frames at IKEA:
Disney art wall

Sometimes I feel like I'm not doing a whole lot, but it's because I've been busy with a ton of little things. It's different for me and honestly kind of nice. Starting from scratch is no joke! There are SO many tasks that pull you in different directions after moving and I'm often flitting from one to another. I'm feeling really good about where we're at though, so the bigger stuff will start soon! 

I'm going to share a source list for everything in the near future, but you should be able to find links to the products in the posts I reference for each space. If not, let me know in the comments. :)

Do you have a favorite "little thing" that you do as far as decor or DIY goes? I think mine would be lighting -- I HATE hanging lights but I always love the outcome! And even just adding a dimmer always makes me so happy -- it makes the house so pretty at night. 

Affiliate links included for your convenience! 

SaveSaveSaveSave

from
http://www.thriftydecorchick.com/2018/02/what-i-have-i-done-in-four-months.html