Wednesday 28 March 2018

Adding some warm and cozy to the basement family room

You know what my favorite weekends consist of? Absolutely nothing. ;) I love when our whole family is home puttering around and we have zero plans other than just hanging out at home. It makes me SO happy. It's rare that we have a couple days like that and I cherish them. 

I'm in between on a couple DIY projects right now (see the peel and stick wallpaper result if you missed it last week!) and it was nice to take a break and work on just decorating. I shared our basement family room with you a few months ago:
Basement family room set up with floating sectional

If you're interested in any sources, please check out that post! 

It's been fun to find spots for our stuff in the new house. Thankfully what we had has filled in the rooms nicely. I always knew what I wanted to put along that wall behind the sofa, I just had to wait a bit. 

I've had the (affiliate) Everett console table from World Market for years and sometimes I think every one of us bloggers has it now! It's a lovely piece that won't break the bank (especially if you wait till they have a sale). I have always known it would work perfectly here: 
Decorating with wood and cozy colors in family room

It's just right for the feel of this room! Warm and cozy and the wood tone is perfect with the other pieces in there. You may remember it's been in our morning room since we moved in: 
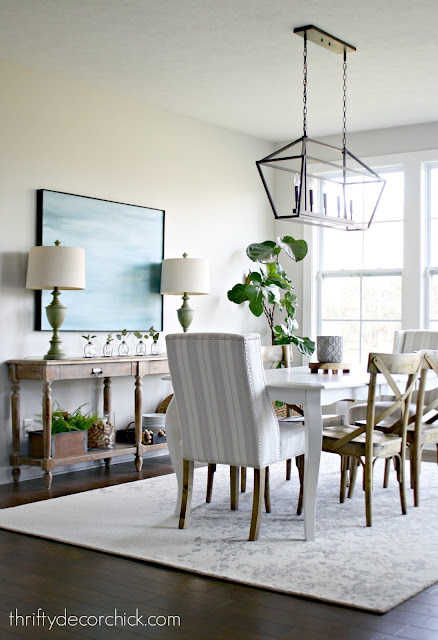
Dining area with white table and wood chairs

Our plan was always to find something else for that spot -- I wanted something that was a solid piece instead of this one with legs. There were a lot of legs in that space obviously, and I knew a solid console would work better. Plus, storage! I found a beautiful piece that I'll show you soon.

But I was so excited to get that Everett table down to the basement family room. I even took the lamps -- I've had those things forever (they were from HomeGoods). I thought I may try new ones, but it turned out I really loved their green color and how it tied in with the big IKEA map nearby:
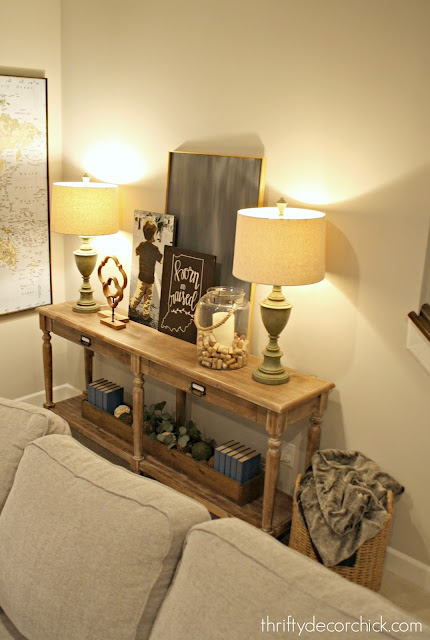
Everett console table from World Market

Years back I added those label pulls to the front of this console and they make such a big difference. I love adding little details like that. I found them at Target but haven't seen them there in years. :(

So here's the thing. I find accessorizing surfaces equally fun and stressful. I think that is the hardest part of decorating a home -- filling in the spots. And I've said it a million times, but once I find the way I like it, it will stay forever. Years. 😂

I didn't buy anything for this spot so it was fun to use items I haven't seen much in eight months! I have found a few tips to be helpful when accessorizing a space: 
Tips on how to decorate with accessories
  • You don't always need to hang art -- leaning gives a slightly relaxed feel that is nice. If you do hang a mirror or art, don't forget you can still layer with other pieces. 
  • The key to decorating bookcases or shelves is to keep the eye moving up and down naturally. It gives it interest and is pleasing to (most) eyes. So if you layer, make sure the art is different heights. Accessories should go up and down as well. 
  • You can't go wrong with at least one candle -- but have some fun with it. I put a timed LED candle inside a pretty glass container and then filled in around it with wine corks. 
  • Books are ALWAYS an easy addition! Use them to add height to a candle or decorative piece. Take the covers off and use colors that you love. Stack and pile them against each other. You really can't go wrong!
  • Add light! I'm a sucker for two lamps on long pieces like this -- I just love symmetry. I try to go with one and then always revert back to two. ;) With two you'll have less space to decorate, which isn't always a bad thing. 
  • I find less is more, but that's just what I prefer. I could have added tons more to the bottom and it would have been fine, but I kept it simpler with my DIY wood trough and filled it with books and some faux eucalyptus. (IKEA has the best!)
How to decorate the Everett console

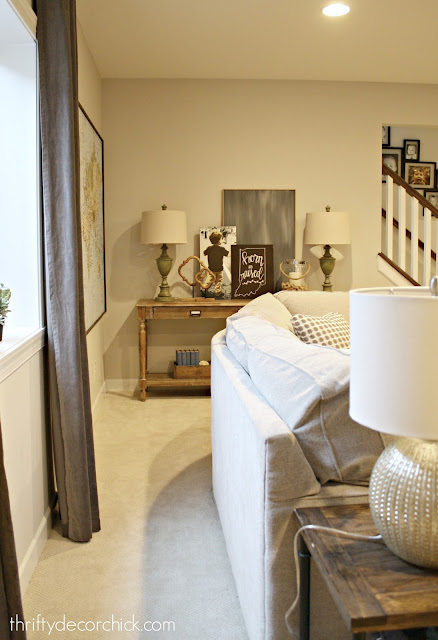
You can see a peek of the new gallery wall on the stairs here! I still LOVE it. 

I painted that art for our master bedroom a few years ago. I almost sold it when we moved but like it here! You can see how I painted it in this post (this is a similar art piece). The artwork of our son is a prized possession of mine. It's him at about two standing in front of my husband's marching band and conducting. 💙 He did that often and it's a memory that we cherish. (He still fights the urge to do it at 11!) I worked with a small company years back that would take photos and turn them into this beautiful art. (They aren't in business any longer unfortunately.) I wish I could remember where I got the Indiana sign -- it must have been at one of the local sales I visit. 

If you're looking for HUGE art to fill a wall, IKEA has great options for a great price. I later added a frame to this one that gives it more of a custom touch and some contrast. I don't think they sell this exact one anymore though: 
Large map art from IKEA

It's fun to focus on fluffing instead of DIY sometimes. A combo of the two is a perfect balance for me! We spent nearly the whole weekend down here -- funny how a small change can make you want to enjoy the space even more.

Week by week, this home is becoming more and more us. It's felt like home since the day we moved in, but each little project really warms it up. Every addition brings me great joy -- making our house a home is my passion! 
Cozy basement family room with sectional

If you have any questions about anything let me know! Be sure to check out this tour first

Here's a few more links if you missed them: 

I hope to finish up a big project this week! Can't wait to show you!


from
http://www.thriftydecorchick.com/2018/03/adding-some-warm-and-cozy-to-basement.html

Succulent and Cactus Decorating Ideas

The popularity of succulents are at an all time high. They are easy to care for (Once you figure it out!), and whether they are real or faux, these succulent and cactus decorating ideas are sure to add fun into your decor.

Personally, sometimes I have found dealing with the faux ones are a little easier for me than the live ones. It’s taken me a really long time to learn how not to over water them. I’ve recently been learning how to propagate succulents, and hope I can master it! While it is fun to see all of the little babies take root and start new plants, but it’s a challenge! Luckily,  the faux ones look just as good as the real ones do!

(This post may contain affiliate links)

Easy cactus and succulent garden

If you love the idea of live succulents or cactus, this easy planter is a great way to make a mini-landscape!

Kitchen sink with gray painted window and brass towel bar under sink. What a great use of the fake drawer under the sink.

Brighten up your windowsill with this trough-style faux succulent planter.

Fun appetizer idea with veggies!

This succulent-inspired veggie tray with dips is a fun way to bring a botanical feel into your next event or holiday.

Make these DIY succulent shadow boxes with gold leaf and succulent and cactus decorating ideas #succulents

Use shadow boxes as a fun display idea for your faux and real succulents.

Make a DIY mini succulent planter with faux succulents

Build your own faux succulent and air plant block planter with clay for an accent in your decor.

DIY chicken feeder succulent planted

A chicken feeder has a second life as a planter with a fun twist on farmhouse decor for succulent and cactus decorating ideas.

Succulents glued on a free summer printable

Faux succulents can also be used as a pretty accent piece to a wall hanging or art work.

Orange lilies used in styling a spring and Easter mantel with succulent and cactus decorating ideas

Faux succulents also make a pretty accent in your spring and Easter decor.

Piping out cactus cake toppers for cupcakes

Cactus cake toppers are a fun way to dress up dessert.

Painting faux succulents with matte metallic paint

When you get tired of regular, old faux succulents, painting them in matte metallic paint is a great way to freshen them up!

Plant Mama mug and tshirt by Jennifer Rizzo Design Company

And for the Plant Mama, there’s always a mug or t-shirt!

I hope you enjoyed these succulent and cactus decorating ideas!

If you’re looking for more plant-spiration, you can check out these posts:

Decorating with plants

Flowers and plants you can propagate to make more

How to make inexpensive botanical art

More succulent decorating ideas

Decorating with botanical style


The post Succulent and Cactus Decorating Ideas appeared first on Jennifer Rizzo.


from
https://jenniferrizzo.com/2018/03/succulent-and-cactus-decorating-ideas.html

Monday 26 March 2018

Bathroom Baseboard Cleaning

While bathroom baseboard cleaning isn’t the prettiest projects in the world, I wanted to share with you how I gave mine a good once over with my HomeRight SteamMachine.

I’ve used my steam cleaner around the house, and even in the shop for projects such as cleaning my bathroom faucet, and cleaning our floor tile.Our bathroom baseboards make me crazy. Maybe it’s because of all of the on-going moisture with the shower and five people, or all of the hairspray, or the combination of both, but the dust gets into the cracks and crevices, and does not come out. It becomes almost like a hardened dark grit, that I almost have to pick out. A wet cotton swab doesn’t even work, and once they are cleaned, it’s almost like they get immediately dirty again. I decided to try it with my SteamMachine and the small nylon brush attachment. Now, I am going to show you probably some of the dirtiest baseboards you have ever seen. It’s funny how you never notice how dirty something is until you have to publicly show it to people.

(This post contains affiliate links)

Baseboards this dirty can be cleaned easily with a steam cleaners #cleaning #steamcleaning #howtocleanbaseboards

First,I dry dusted the baseboards first in hope of getting off any loose dust and debris. A quick vacuuming would probably do the trick as well. Then, I made sure to test a small area first before cleaning your bathroom with a steam cleaner. We have paint specifically for bathrooms on the walls and on our trim, and our trim is sealed with caulk to make sure that water and moisture from the showers can’t get behind it. I wouldn’t try it if you have any doubt about your paint, or trim, or how it’s sealed.

Cleaning dirty baseboards with a steam cleaner

Once I did a test patch, and I found it was going to be OK, I used short, quick bursts with my HomeRight SteamMachine to minimize the water, and immediately wiped it up. I was super impressed with how just using a little bit of steam blasted the gunk right out of the caulked area! It wasn’t a huge effort to do it either, and didn’t take very long.

Cleaning bathroom baseboards after cleaning with a steam cleaner

Next time, I will probably incorporate my bathroom baseboard steam cleaning into cleaning my floor tile, and be done with it. I was really happy with how clean  my bathroom baseboards came! You can see the full project here at HomeRight.

You can also HomeRight SteamMachine on Amazon.

This post was sponsored by HomeRight, opinions are entirely my own.

The post Bathroom Baseboard Cleaning appeared first on Jennifer Rizzo.


from
https://jenniferrizzo.com/2018/03/bathroom-baseboard-cleaning.html

Friday 23 March 2018

How to install peel and stick wallpaper

I'm so excited to share this project with you all! I wanted to wait until I was completely done hanging this peel and stick wallpaper before I shared the tutorial. I told you last week about some of my DIY plans for the house and how I planned to use (affiliate) this wallpaper from Target:
Target Devine peel and stick wallpaper
The online reviews were pretty good so I figured it wouldn't be too bad to install. But then a couple of you said it was a pain so I got nervous. Ha! Well I'm pleased to say it went really well and I'm super impressed with this stuff so far. 

Here's a recap of how I cut and hung it, because it is different than regular wallpaper. It's like contact paper so it comes with the plastic backing. The only thing I would change is that part -- I SO wish there was a grid pattern on the back to help with straight lines!

This is what you'll need: 
Peel and stick wallpaper tutorial before and after

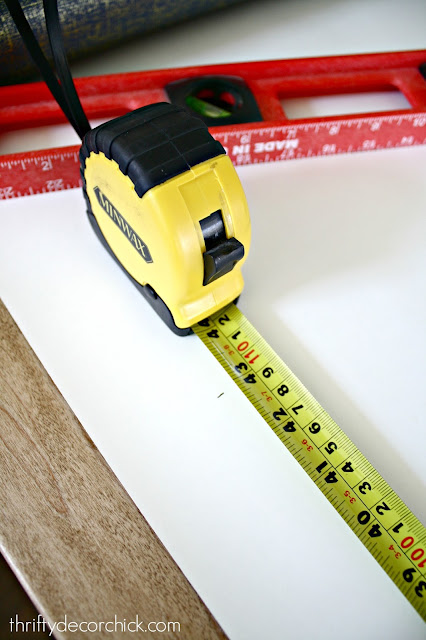
I used a level for a straight edge, measuring tape, a pen and scissors. 

I was only installing this around the top portion of the walls so I didn't have to be super precise with my measurements -- the top and bottom will be covered with trim. 

I measured down the length of the paper and marked that measurement at a few places across the back:
How to measure and cut wallpaper

That way I could use my straight edge to draw a line for cutting:
how to install peel and stick wallpaper from Target

Sorry for the blurry pic -- my camera is acting up!

I watched a video one how to install this product and they suggested placing some cardboard on the floor and using a level and razor to get a straight cut. We don't have any floors I would dare use a razor on -- even with some cardboard underneath. So I just cut it with scissors and it worked fine. 

My lines weren't perfect but since I'm covering the bottom with trim and the top will be under crown molding, I wasn't worried about it. If you aren't planning on covering your edges, you may want to try using the razor and a straight edge at least for the top of the wall. (At the bottom you can use a razor to trim it off at the baseboards.)
Step by step for peel and stick wallpaper

I started over the door -- it was the smallest part and also the most inconspicuous. I didn't want to start on the first wall you'd see when walking in! ;) 

I'll share a list of specific tips at the end of this post, but as I went around the room I realized how easy it was for the pieces to start get a little wonky. I started using a level to draw just a bit of a straight line to see how straight each one was hanging:
Tips for hanging peel and stick wallpaper

As long as the wallpaper was similarly spaced against that line I knew I was good. 

OK some of you will hate me for this...but I actually found this kind of fun. It was oddly satisfying -- like painting a room a little bit at a time and seeing it transform bit by bit. The first few seconds were definitely the hardest -- getting the piece to match up to the one before. But when it was right then it was just a matter of spreading it on and getting any bubbles out. (That part was fun.)

They suggest using a squeegee but I just used my hand -- worked great. The bubbles are easy to work out and I didn't have many anyway. You can easily pull the paper back up to get bubbles out too. 

Even though I'm adding crown molding, I did end up trimming the tops just because they were bugging me -- you just take a razor along the corner to trim them up:
How to clean top of wallpaper

Those pieces peel away easily after cutting:
How to clean up edge on wallpaper

That's the same process you'd use along baseboards too. 

It's obviously not even close to done, but I like taking you on makeovers step-by-step! Here's how it looks now:
Blue and gold peel and stick wallpaper from Target

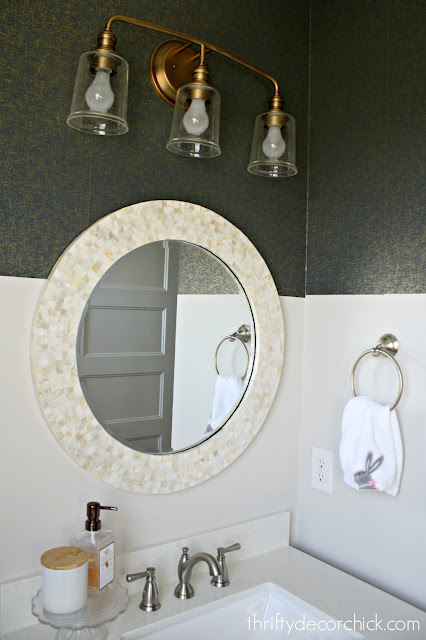
We LOVE how it looks!! I'm so happy we like it! 😂 It's turned this bathroom into a little jewel box -- I can't wait to see how the rest comes together! I just love it with the light fixture and the mirror:
Target peel and stick wallpaper review

I'm not sure how regular wallpaper works (I've only ever used it for artwork, not on walls), but I tried wrapping the inside corners with one piece and it was WAY too difficult. With wallpaper I'm sure it's easier to scootch around. 

So for these corners I would just cut to the size needed and then start with a new piece on the other wall:
peel and stick wallpaper in corners

You can see just a slight bit of the wall color in some spots but I'll paint those a dark blue and I think they'll totally disappear. (Target sells paint that matches their wallpaper by the way.) 

I only had one outside corner to do and that one I wrapped around the corner. 
how to install peel and stick wallpaper

It is NOT perfect, that's for sure. I gave up perfection in my 30's so it doesn't happen much around here anymore. ;) But as I always say -- if anyone is that good that they notice the slight imperfections then they get a COOKIE. But if they notice in and then tell me they noticed it...maybe they won't get one cause that's kind of rude. Hmmm...

Here are some tips and my thoughts about this stuff!
  • This particular design is EXTREMELY forgiving. Thank goodness! It's so great because you can put any two pieces together and you really don't see a break at all. 
  • You'll see more imperfections with the lights on or in direct sunlight than you will with lights off. You can see where some pieces overlap a bit, but you have to look for it. Even unforgiving wallpaper shows seams so it's something you just need to consider. 
  • I did learn as I went to cover the seams in a certain direction -- some spots you can see the edge of the paper (because I overlapped them slightly to make sure if they expand or contract you still wouldn't' be able to see the wall). If you work with the light sources in the room you'll see how it works better to overlap in certain directions (away from the light). 
  • This wallpaper is basically contact paper and you can peel it away and restick over and over. A few I put all the way up and then completely removed to rehang once or twice. They still adhere just fine! 
  • I was nervous to let the sticky back touch any other part of the sticky back because I thought they'd never come apart and be ruined. It happened a few times and they were easily separated. 
  • I found it was best to peel the backing from the top and a corner and then fold the paper back so it wouldn't get in my way. Then once I had the top section right, I'd start peeling the rest of the backing off as I went down the wall. Sometimes it didn't meet up right so I'd have to take the whole thing down and start over. But again, it keeps it's stick just fine. 
  • For the skinny parts next to the window and door I installed the paper above, and then just cut a smaller strip for down the side. You can't tell at all that they're not all one piece.
  • I hung a few strips and left them up for a couple days before finishing the majority of the work. Just to make sure they stayed up!
Even though I didn't find this too difficult, I can see how doing the whole length of the wall would be a LOT harder. If you try it I recommend a smaller part of the wall like this, and definitely a forgiving print as well! At least for you first try. :) 

If you have any other questions, let me know! Now I'm on to phase two -- paint and molding! 

Have a great weekend everyone!


SaveSaveSaveSave

from
http://www.thriftydecorchick.com/2018/03/how-to-install-peel-and-stick-wallpaper.html

Tuesday 20 March 2018

How to install pretty landscape lighting

HELLO there! I can feel it...my mojo is coming back after a long winter. Just in time for it to rear it's ugly head again this week! But I digress. Let's talk about stuff getting done, shall we? 

There are definitely going to be some repeats as far as projects from our old house. Which is to be expected -- if we loved it and it works here then it's going to happen again. What's fun is seeing how the same idea translates to a different house! This is one of those projects. I wrote an extensive landscape lighting how-to years ago and you can refer to that for all the details if you want to try this project. 

If you're like me and like to creep stalk drive by pretty houses, then you'll understand me here. I like to do this, preferably in the early evening when it's dusk and not totally dark but just that perfect time of night. You know that time I'm talking about? Well that's when I drive by houses. It also needs to be in spring/summer or fall. No reason to stalk landscaping ideas in the winter around here. 

I learned many years ago that when there was a specific house I was drawn to -- no matter what size or price point -- it had one feature I loved. That was landscape lighting. It takes any house up multiple levels because it just looks expensive. After drooling over it for years I finally figured out how to do it myself and it is NOT HARD. 

There is zero electrical knowledge needed. If you follow this and the outdoor lighting tutorial I mentioned before, you can do it. It's such a simple project, I PROMISE. Sunday it was just gorgeous here and instead of working on peel and stick wallpaper, I decided to get outside and take advantage of the warm temps. I've been itching to start our exterior lighting since before we moved in and I'm thrilled with it! I'll go over some of the basic steps here.

1. Pick out your lights

I'm working on one side of the house for now and I chose wall wash and spot lights. They're pretty similar but the wash versions light up a wider space than the spots. Here's what I picked out (these are from Lowe's):
wall wash landscaping light

spot landscaping light

One thing has changed since I last did this -- now they're LED and the bulbs can't be changed out. This is nice because the bulbs did tend to go out (depends on how long you have them on at night). So you don't have to change these, but the price of the fixtures has gone up to reflect that. Over time it's a savings because of the LED lights instead of halogen bulbs. You'll save on operation and replacement bulbs.

2. Pick out transformer and wire

When you have your lights picked out it's time to figure out what size transformer you'll need. This is what you'll plug into an outdoor outlet to power your lights. This is another bonus as far as LEDs are concerned -- before you had to spend a lot more on higher voltage transformers if you had a bunch of lights. Now the smaller one will work for most. 

To figure out the transformer you'll need to add up the wattage of all of your lights. That's easily found on the box. I had two spot lights at 5W (total of 10), plus two at 9W (total of 18). I'm at less than 30W so a 100W transformer is plenty: 
transformer for landscaping lights
They sell 200W too, and that would power at ton! I'll use that size for the back someday when we add a patio. 

The wire is available in 12, 14 and 16 gauge. Go to my tutorial for a helpful guide on what to use. I used 16 gauge for this project. You can also pick the length you want. I went with 100 feet so I can use the extra for the other side of the house. 

3. Connect wire to transformer

The only part that even resembles electrical work is getting these two connected. All you'll need (really the only tool you'll need) is a (affiliate link) wire cutter so you can strip the ends off the wire: 
how to add landscaping light tutorial

Then you just screw those into the bottom of the transformer. (I lied, you'll need a screwdriver.) 

Do NOT plug your transformer in just yet. Just place it where you'll keep it. 

4. Lay out your wire and connect the lights 

This is the fun part! First, lay the wire out to the areas you want light. Want to light up a tree? Take the wire over to the tree and then wind it back to the next spot. Lay out the plan with your wire first. I like to give myself some excess -- you won't be able to decide on your ultimate layout until the lights are installed and you can see how they illuminate everything. You may have to adjust placement a bit after you install lights, so don't have the wire taut between each one. 

This is how easy it is to wire these -- this doodad will be on the light fixture and comes with a cap that you unscrew: 
DIY landscaping light tutorial

See how the wire is run through there? That's all you do -- slide your wire into the bottom of this piece. 

Then to connect the fixture, you just screw the cap back on: 
how to wire landscaping lights

There are two metal prongs at the bottom of that cap that pierce the wire and create the electrical connection. Remember, don't have the transformer plugged in till you are completely done!

At the end of your landscape lighting you'll just cut the wire. They sell small pieces that go over the end, but I've found electrical tape does a fine job:
How to install your own landscape lights

5. Check and adjust

NOW you can plug in your transformer! Obviously it needs to be at least a little dark for this part, because you'll need to see how the lights shine on everything. This is when you can rearrange for the best effect. 

The hardest part of this whole project? Burying the wires in the mulch or grass. I've only done it in mulch and it's not really difficult, just time consuming. You just take a small trowel (or your hands work well too) and just create a path in the mulch, then cover back up. It takes more time to do that than wire the whole project!

You can see here what the wires look like:
Step by step landscaping light tutorial

If they don't bother you, leave them out. They bother me. Surprised? 😂 I suggest living with the lights for a couple nights before you bury them though. I buried ours and then decided I wanted to move a couple, so I have to do most of it over again. 

It's kind of fun to play with the placement to see what you like best:
Picking out landscaping lights for your house

The two wall wash fixtures were plenty for this side of the house: 
Step by step landscaping light tutorial

And then I added the two smaller spot lights on the pine tree off to the side:
Easy landscape light tutorial with pictures

I have waited for months to do this! Our house looks so pretty at night now. :) I can't wait to do the other side too. I have a slightly different plan for over there -- it will have more fixtures so I'm waiting for the budget to open up again. 

I cannot even tell you how nice it was to work on an outdoor project again. If you look close you can see our petunias in the window boxes. Goodness that makes me happy. And just in time for a snowstorm tonight! 

I am SO EXCITED to put some of my plans into action for our exterior. It's already beautiful but I know little touches like this make a big difference. 

Here are a few tips if you want to try this project:
  • Less is more when it comes to landscape lights. On our sidewalk on the other side of the house I initially planned ten path lights. Then I set up a couple and stood back on the street and realized that was going to be WAY too much. It's easy to go overboard with them and in my opinion, distracts from the beauty. 
  • If you're lights aren't working your connection is probably off. Sometimes the prongs don't hit the wires just right (each prong goes into one side of the wire). You can try tightening them or moving them to get a better connection. If you do move one, make sure to cover any holes well with electrical tape, but I'd avoid moving them too much. 
  • You can connect lengths of wire -- they sell connectors at the store if you need more coverage. 
  • Spot lights are great for trees and I like them on houses too. Wash lights just give off a wider light so I went with those for the front. Path lights are great for sidewalks because they direct the light down but I also like them placed here and there in landscaping. 
  • Play around with the placement! If you put them closer to the house you'll have more of a "beam" that will go straight up the wall and is really pretty. I love that look but with our stone it gives weird shadows. Further away widens the light.
  • You can set your lights to be on all night (they automatically go off and on) or for one to nine hour increments. 
  • You can hide them behind plants easily but I don't mind seeing them out. Many of the fixtures are really pretty and work with different house designs -- traditional, craftsman, modern.
  • This isn't the cheapest project in the world -- but it all depends on what you do. This was well under $200 total. You can buy multiples in packs to bring the price down. But it's a permanent upgrade to your home and worth in my opinion. AND you'll save a bunch doing it yourself.
  • Solar lights are much cheaper but don't provide nearly the light. They also tend to have a blue tone. 
  • Remember to check out this landscape lighting tutorial for all the details! 


SaveSaveSaveSaveSaveSave

from
http://www.thriftydecorchick.com/2018/03/how-to-install-pretty-landscape-lighting.html

Tuesday 13 March 2018

My first big DIY projects in the new house

Well hello! How was your weekend? We went away for a mini family vacation to one of our favorite places on Earth -- New York City. As always, we only stay for a few days but we pack in a TON! I've shared our love of the city many times over the years and shared tips on what to see and do on a quick trip to NYC. Be sure to check it out if you are looking to travel there!

We're back and settled and I'm finally going to bite the bullet and buy a new saw this week. It disappeared in our move and I'm feeling frozen without it. I have so much I want to do in the house and I gotta have one to get moving! All these ideas are swimming around in my head -- I wanted to share a few with you.

Before we even had drywall in this house I knew what I wanted to do with this fireplace wall in our family room:
Tall ceiling and fireplace in family room

We LOVE love love the tall ceilings in this room. 

I've shared this photo with you before because it was our inspiration for our old house. We looked into adding on to that house years and years ago, and this picture was my dream for the family room: 
Tall fireplace wall with gray paint

Well idea that was squashed quickly -- the quotes for a project of that scale were way too much. So we did the next best thing (for WAY less) and knocked down a wall instead

But when we walked into this house...I knew I could recreate the look, at least a bit. Obviously our current ceilings aren't as ornate as those in the photo, but we do have the fireplace! I've always known I wanted to add a dark paint to the fireplace wall, now I just need to figure out the color. And the wall treatment! That's the part I'm most excited about. I want to do something with molding but haven't decided on the exact look just yet. It's almost there in my head...

That wall is calling out for something to add some contrast to the room!

And remember when I said I wasn't going to add built ins next to the fireplace? And remember when I said don't quote me on that cause I may change my mind? Well...my mind may be changing. ;) I'm starting to get an idea in my head of how I want this to look and I think simple built ins would be lovely. We'll see what I decide! I know my ideas will change because I have to live in a space a long time before I know exactly what I want to do.

One project I want to start sooner than later is our powder room: 
Small powder room with gray vanity

Funny, because our powder room was the first room I redid in the old house nearly 14 years ago too. It was my first project with power tools and let's just say I'm a little bit more knowledgeable now. ;)

I want some contrast in here too (can you tell I love it?) so I plan to add a simple board and batten look to the bottom two thirds like I did in our old family room:
Tall white board and batten

And then I've been playing around with wallpaper on top. I saw this gold flecked peel and stick wallpaper at Target last week and fell in LOVE!: 
Gold speckled peel and stick wallpaper

Gah, I just think it's awesome. (Here's is an affiliate link for that version.) I just don't think it's enough contrast for me in this room. Instead I'd really love to add this to my master closet someday. 

I found this linen-looking wallpaper online (also at Target as well) and I LOVE IT:
Blue and gold linen-like wallpaper
It's a navy blue (you know I love that) with gold in it. The room has brass accents so I think it's going to be really beautiful. The reviews on this peel and stick stuff are great online -- have any of you tried it? I'm really excited to try this out!

A project I hope to finish up in the next few of weeks is the stairway wall. You may remember this inexpensive wood wall I did in the old house:
Inexpensive wood wall in stairway

We loved it so much I'm going to do it again, just with some tweaks. 

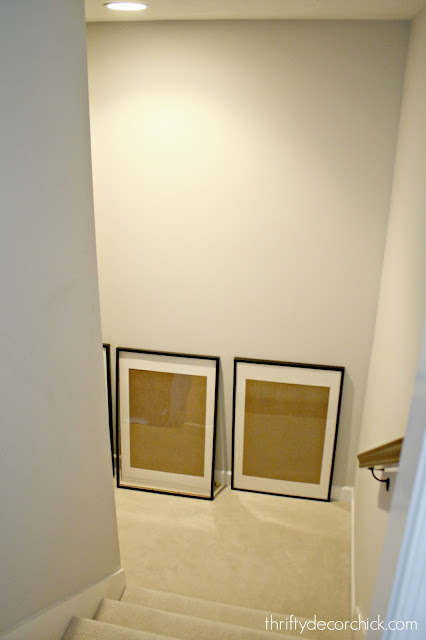
The landing to our basement in this house is quite a bit bigger, so it will make even more of an impact!:
Landing wall in stairway

Those frames have been sitting there since we moved in! I've had them for years (from IKEA) and every time I went to get rid of them (we didn't have room for them in the old house) I decided against it. I'm glad I did! They're going to look SO good on that wall when I'm done. I may have to do something fun with the light fixture as well. 

I've also been playing around with molding ideas for the long wall in our foyer:
Long foyer with dresser and round mirror

Right now I'm planning on going with a floor to ceiling idea like this one: 
Floor to ceiling trim squares/wainscoting on wall

I've always loved the full wall look and am excited to add it to this house. (It's just a larger version of this wainscoting I've done in the past.) I think that wall will be perfect for it -- I just have to decide on a color. I'm thinking white but may go crazy and pick a dark color. :) Our foyer gets a lot of light so I can go darker in there if I want. We'll see what I decide!

By the way, if you know a source for that photo let me know! I've had it saved for awhile. 

Now I'm off to find a new saw! I'm ready to dive into this projects. Let me know if you've tried that peel and stick wallpaper and if you have any tips! It's been so fun to dream up these projects for our new home! 


SaveSaveSaveSave
SaveSaveSaveSave

from
http://www.thriftydecorchick.com/2018/03/my-first-big-diy-projects-in-new-house.html