Hello there! This is a quick lighting change that makes it easy to customize the lighting in a room. I'm sharing how I adapted a drum shade to create the look of a flush mount light in our bathroom too!
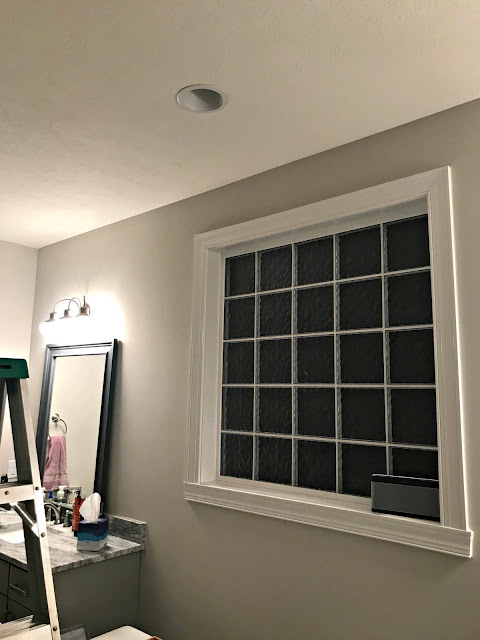
We have a recessed light above the tub in our bathroom, which is great. I always had plans to covert it using a light kit. Here's a night time view before I started:
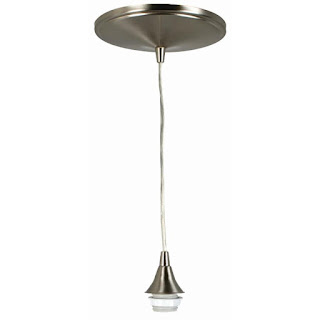
First I used the converter kit -- it's a simple change! You screw it into the recessed light like a light bulb, and then there's a part that hangs down so you can hang a pendant fixture on it. (You buy those separately.) Here's a look at the converter kit I used:
I actually used this years and years ago over our kitchen sink. It works great and you can adjust the length of the cord easily.
I'm OBSESSED with some beautiful lamp shades at IKEA called Nymo -- every single time we go in I drool over them. They're the most beautiful colors and have such pretty detail. They have a really large size that I fell in love with for our master bathroom.
I ended up getting a large black one for that room, and hung it using the converter kit. It was plenty high, but I did some checking on electrical code and found out it was going to hang a little low for the measurements required above a tub.
We couldn't touch it (you want to make sure you can reach for it if you're falling) but I was still wanting it to be higher just in case. So I thunk and I thunk about how I could still use the fixture without that being an issue. And I came up with a plan!
I used (affiliate) my pipe cutters (I use them more than you'd think -- they're great for cutting down drapery rods!) to cut off the round part in the middle off of the shade frame:
Yes, that is a cat butt you see.
He's always with me:
I had a plan to use cup hooks in the ceiling to hang the shade but couldn't get my ladder under the shade just right to reach. So I traced the shade on some paper, then marked where the cup hooks needed to be:
I used painters tape to tape it to the ceiling (centered on the recessed light) and then marked where my cup hooks needed to go. I took it down and added my hooks where I marked.
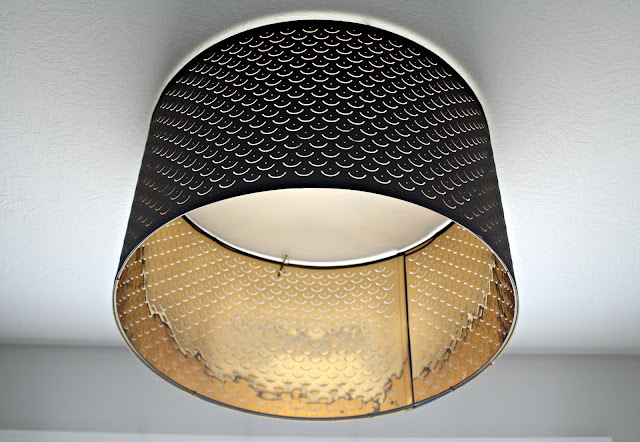
I was able to hang the shade directly from the ceiling so it looks like a flush mount:
This way I'm using the recessed light and just hanging the shade around it, so no worries at all! I cut the wire mount out of the middle because I didn't want it in the way of the light bulb.
I LOVE IT! Gah, aren't these shades so pretty?:
I ended up cutting the metal down a bit more because you could see them sticking out from underneath (although we're the only ones who will see that part):
It gives us the look of a flush mount light without it hanging down over the tub. It's SO pretty at night especially!:
That gold inside just makes it!
Because I still had the recessed light converter, I went ahead and added another shade (I already had it for my husband's office -- but he'll need a bigger one anyway) to our little hallway I showed you earlier this week:
Goodness I just love these! Somebody please stop me from adding them all over my house. The price is great for the detail and size. So pretty!
If you have a recessed light that is centered nicely in a spot, these are a great option to add a little detail and customization to your house too!
Have any of you used these kits? Of course you can use anything as the pendant -- shades, baskets -- so many fun options!
You can see how I used a lamp shade to make over our old ceiling fan here -- what a difference that made!!
from
http://www.thriftydecorchick.com/2018/02/using-lamp-shade-as-light-fixture.html


No comments:
Post a Comment