The one rule that I love most about abstract painting, especially when I teach/lead a workshop on it, is that there really aren’t a lot of rules. For me,it isn’t about having to draw the perfect line, or make it look exactly like a tree… It’s about painting what you feel, and what you see, and if you like it or not. The scariest part of abstract painting is having to get over is putting that first stroke of paint on the canvas. My DIY abstract painting tutorial today is more about giving you the direction, and guideline, and how to use an abstract painting technique that involves layering paint. We are also going to have fun using an unconventional painting tool too, so pull out your drywall putty knife, and get ready to paint!

I’m using a wood framed board canvas, but this technique could apply to a regular canvas as well.
For this project, you’ll need:
A large flat brush, a 3″ drywall putty knife, paper towel, canvas, palette or plastic plate

DecoArt Premium Acrylic paint in Titanium White,Warm Grey, Carbon Black, Burnt Umber and Cadmium Yellow Hue, Extreme Sheen in 24K Gold, and Creme Wax in Deep Brown ( if you are going to stain the frame.)
This project would also be a good way to use this kind of paint.
If you want to add a frame in an inexpensive way to your canvas, you can see how to do that here.
Start by painting a layer of Titanium White on your canvas. This will ensure a smooth glide for your future paint layers. This is a good idea to do even if you buy a pre-gessoed canvas.

Paint short brush strokes of black, burnt umber, gray and yellow, covering the canvas. This is probably going to look pretty bad. It’s ok, it’s just a base layer. We are going to cover most of it up, I promise, so don’t panic.

After your base layer is up, use a large brush to make downward strokes towards the middle. Turn the canvas over when you want to do the bottom edge. You want your strokes to be slightly patchy, so the colors underneath peek through a little.

Once you have the coverage you like with the white paint, next use the warm gray, and your large brush to paint a line straight across the middle of the painting. Use short downward strokes, moving across the canvas horizontally.

Mix some black paint in with the Warm Gray paint, and brush on some sections of a darker gray over the lighter gray. When I painted on my gray line, I made one side wider than the other. That was just a design choice. You can keep it the same size if you want all of the way across.
Here’s where you get to play with your drywall putty knife.

Pick up some white paint on the edge, and with a downward motion, apply it to the canvas, stopping at the gray line.

You should get a really patchy , organic kind of pattern, and that’s just what we are going for! It’s that look for incompleteness that makes this painting of this DIY abstract painting! Flip the canvas upside down to work from the other edge.

Once your white is applied, take a brush and stipple some gold on over the middle of the gray, using a light, pouncing motion, moving across the canvas.

Once your stippling is done, use the putty knife again to apply the gold paint in a random way across the line, right in the middle.

It almost goes on in a blobby way, and I like that. Once you have your paint on, and you like what you see, let dry. Less is more when adding paint.

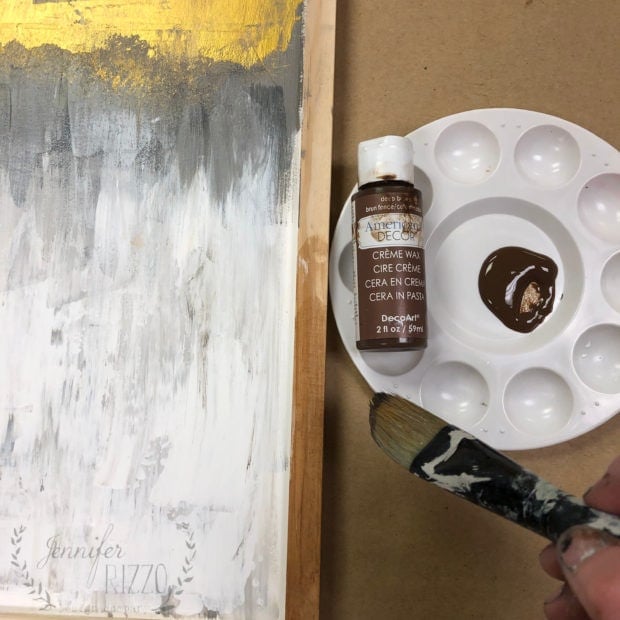
I wanted to give the frame a natural feel, with a little color, so I used Americana Decor Creme Wax. It let the natural wood come through, and gave it a rich finish that paint wouldn’t do.

After applying it with a brush, I used a paper towel to remove the excess and let dry.
Once the painting is dry, just put a sawtooth hanger on the back to hang, and enjoy your artwork! When I staged the picture, I couldn’t decide which lamp to use, so I pulled three different lamps from around my house to see which one I liked best.

I tried a wood lamp first, but I felt it was a little tall, and I couldn’t really see the painting.

Then, I tried a slightly smaller white lamp, but it still felt tall.

I finally decided on this small black lamp from the kitchen, I felt it showed the painting off the best, and was the right scale. I hope you enjoy diving into DIY abstract painting! Let me know if you try it, I would love to see your painting!
If you liked this tutorial, you can check out this tutorial on how to paint an agate-inspired painting.

This post is sponsored by DecoArt, opinions are entirely my own.
The post DIY Abstract Painting appeared first on Jennifer Rizzo.
from
https://jenniferrizzo.com/2019/01/diy-abstract-painting.html

No comments:
Post a Comment