Hey there friends! I've been so crazy busy this past week -- sorry for the silence here. I love being as productive as I've been, but I absolutely hate having so much going on. It ALWAYS feels like this at this time of year and EVERY year I say I'm not going to let it happen. And it does. Every year. :)
But after tomorrow I think life is going to slow down quite a bit...I cannot wait!! I'm almost done decorating -- just a few more things I want to get done. But it's looking so festive and I've really enjoyed decorating our new home for Christmas.
I wanted to share some tips on how I decorate our very tall, fake tree. I love it more than ever this year because I did a couple things differently. Fake trees can be hard because they can look so obviously...fake. But these tips are great for filling it in and make it look really full and pretty.
First of all, you gotta fluff that thing as much as you can. I know it's a pain, but it makes SUCH a big difference. Reach all the way in on each branch and pull each piece out in a different direction. I place some going up, some down and I pull the branches apart and make them wider wherever possible. It takes some time but fluffing as much as possible really helps.
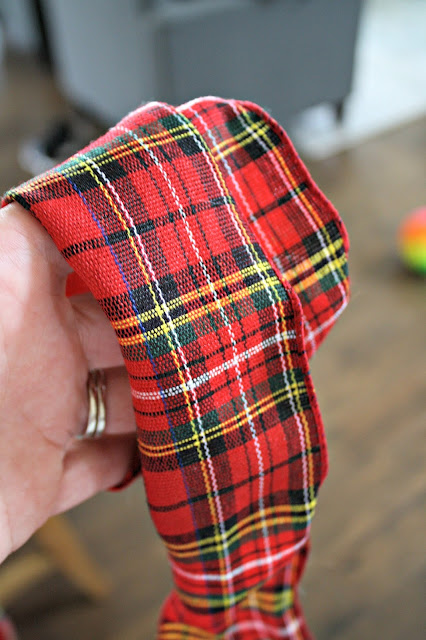
Next up, I add ribbon. I like wired, thick ribbon. I got this a couple years ago at Joann's:
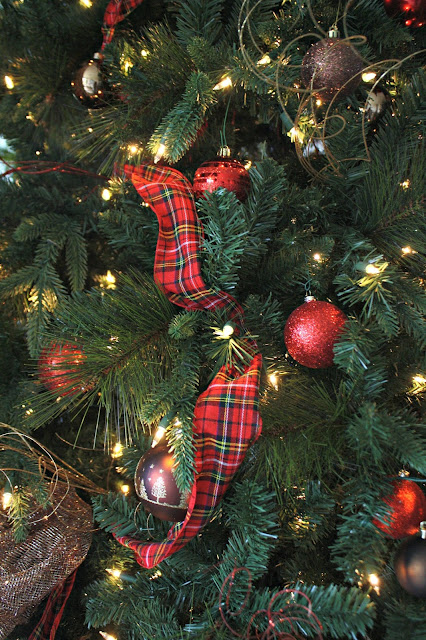
I found a very similar version here. I love plaid at Christmas! I'm actually quite obsessed with it this year. I usually wrap it around the tree (as you can see on our tree last year), but I wanted to make it feel a little more relaxed this year. So I started at the top and just kind of tucked it into the tree as I went down. Make sure it's not tight! Pull it out as you go down to make sure it has some movement to it. You want a lot of ribbon so you're not worrying about making it loose. I tucked and weaved it from the top to the bottom:
And I love it. I don't think I'll go back to wrapping it around just because I love this so much!
Next up -- more filler. I've had this mesh stuff for years:
It comes in big rolls (you can get it in red here) and years back I cut the width in half. As it comes it's REALLY wide (if you love the big poofy look keep it as it is) so I knew I could get more out of it by cutting it down. I got twice as much for the same price!
I used to wrap this around the tree too (also tucking it in here and there) but this time I tried something different. I grabbed it every few inches so it poofed out, like so:
And then just stuffed it in places that were a little bare (I did this before the ornaments were on). It's great in spots where you can see through the tree:
It's nice because you can kind of fluff it and it will fill in the spot well.
After that I put the ornaments on, and we use a lot of them. Most of our ornaments are super cheap plastic ones I just throw back in the bin each year. They look awesome and have held up for years. I don't see the need to spend much on bulbs. And if you have cats or toddlers, they're going to knock half of them off anyway so...it's just a good idea.
A few years ago I started mixing brown and red on the tree (and in our Christmas decor in general) and I LOVE it. You wouldn't think brown would be a great Christmas color but it looks fantastic with both red and green.
The final step gives some bling and fullness to the overall look. I use these sparkly twiggy things from the craft store:
I've seen them called ting ting branches or wispies. They are long wood sticks I've seen them in gold, silver and red. I try to save mine year to year but after awhile you need new ones -- I got these for $3 on sale and used eight packages.
Warning -- they are messy! SPARKLE everywhere. But I love how they look on the tree so it's worth it. (They are the worst the first year you use them because you have to pull them apart.) I use three to five of each color together and just stick them in the tree in various spots:
Aren't they fun? I used to use berry pics from the craft store but for such a big tree I'd spend a small fortune. These are much more affordable.
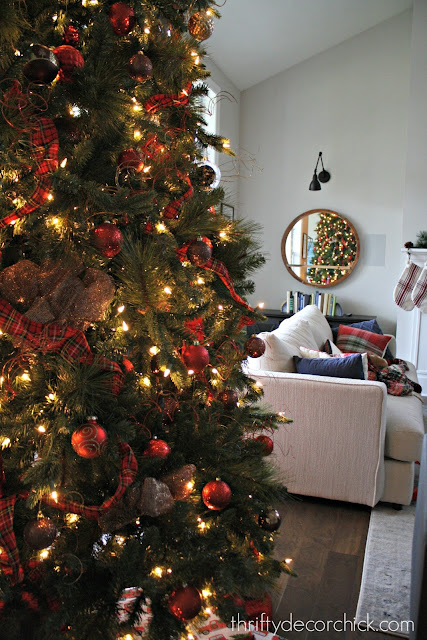
The end result? My favorite tree ever:
It's a beaut Clark!
There's simply nothing like a lit up tree, right? It's truly magical.
Oh and guess what? I don't add anything at the top. Toppers are hard. I don't love them honestly. On a tree this big we'd need something that makes a big statement and I don't want to do anything that will take away from the rest. So most of our trees go naked on top:
And I'm certainly not going up that high to hang it either! ;)
Those tips should help if you're looking to make your tree the prettiest yet this year. Of course anything goes -- take a trip down the aisles at the craft store and see what catches your eye. If you love it, I bet it would look good in the tree. The possibilities are endless!
I prefer a more traditional look for our beast:
I can't wait to show you what else I've been up to lately! I've been working my butt off and it's all coming together beautifully!
Do you have any tips for decorating a real or fake tree? I'd love to hear what you do!
Affiliate links included for your convenience.
from
http://www.thriftydecorchick.com/2017/12/how-to-create-full-and-beautiful.html


No comments:
Post a Comment