Sooooo remember when we first moved in and I was totally in love with the simplicity of the new house? I didn't want to add too many tchotchkes and really enjoyed the quiet in the house after a few months of craziness.
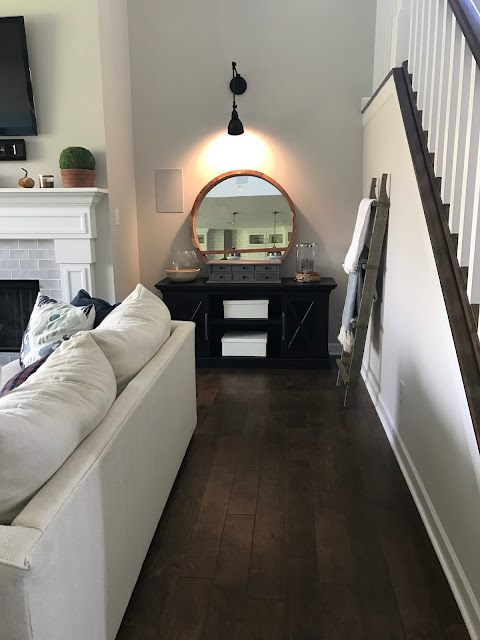
I was SO sure I didn't want to add built ins to the sides of the fireplace. Even though they called out for it because of the design of the fireplace, I thought for sure I just wanted furniture. I found these consoles for a great price and shared them with you here:
I didn't have anything hung just yet and I ended up just adding some books to the top till I figured out exactly how I wanted to decorate them.
But the longer we're in the house, the more I want to cozy it up -- I so enjoyed that simplicity for a few months, but now I feel the desire to make it feel more like us. And if you know me...you know my heart belongs to built ins. ;) I've mentioned over the past few months that my mind was changing. And I'm so glad it did!
I drew up a very simple design and kept in mind on the one side of the fireplace we'd need to house our electronics and sound system stuff like a subwoofer (it's been sitting out all this time). I started on the easier side for now, and now that I've got it down I'll start the other one. But I had to share it with you!
I LOVE building things like this. It's so satisfying and I find it fun. It's like a big puzzle. But I don't use any fancy tools or materials to do it -- so YES, you can do this too!
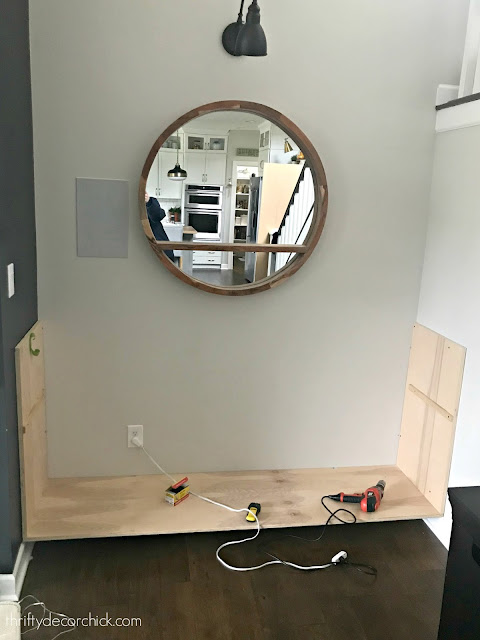
This kind of spot is perfect because I have plenty of walls to work with for support. Building a piece in a space like this is easier. I started by screwing the side pieces to the bottom shelf from underneath. Then we placed it directly on top of the baseboards. No need to remove them!:
The baseboards gave me enough support to get started. I secured the sides into studs in the wall:
My next step was to add supports for the middle shelf -- I just used some scrap wood from my chunky DIY door trim from the old house. Make sure they're at exactly the same height on both sides:
These are the screws I use for projects like this -- they say drywall but are are also suitable for wood projects:
They grab into the wood and screw in SO easily. I use the 1 5/8 length for connecting pieces together and a two inch screw for securing the sides and supports into studs.
I also like that they sink into the wood easily, so I can fill the holes and you won't even know they were there. I share this because you don't need any special jigs or tools to build! You just need strategically placed screws. ;)
I added the middle shelf next:
I secured that with screws into the supports on the sides, and then added a 1x2 support across the back underneath the shelf as well. I screwed that into studs along the wall. By the way, there's no need to add a wood back when you have caulk and paint. It will look like one big piece by the time I'm done.
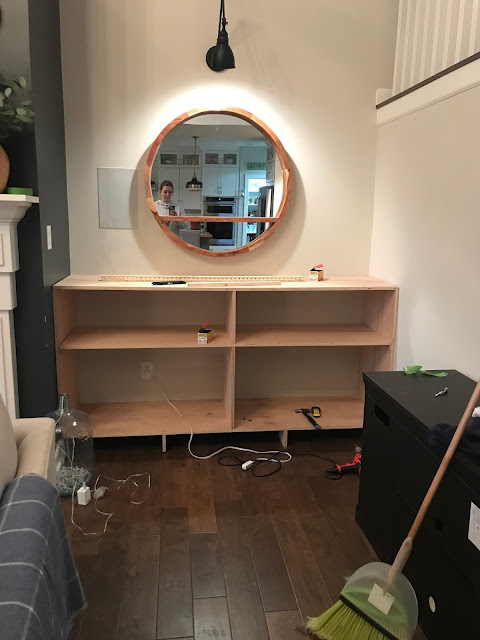
Because the shelves are long, and I wanted a little more detail, I added middle supports for each one, and then added the top:
I secured each support piece from the top with screws. Additional support is provided with the trim work I added to the front, which I'll show you in minute.
You can see I also added supports underneath the whole built in on the floor -- they're just scraps I cut to size and secured with screws.
It's amazing how much of a difference the trim makes! I used 1x2's in select pine (clean pine without knots) to finish off the front of the bookcase:
I still have to add quarter round to the base, as well as caulk like crazy. I've said it a million times -- caulk makes almost any project look professional! All the imperfections disappear with that stuff. Don't worry about it looking perfect!
I'm going to add a support to the top shelf like I did the bottom. You can't even see it on the bottom shelf from this view, and when it's all painted out you won't see either of them:
Here are a few other details if you'd like to try this project:
- The lovely folks at Lowe's cut all of the wood down for me -- I had my exact measurements for them.
- I used two 4x8 birch boards and one smaller 2x4 board for the whole project. Total cost was around $160 for all the materials (boards and trim) and I have some scrap leftover. If I had our builder do these it would have been nearly ten times that much.
- You'll need a stud finder to make sure you attach to studs and I recommend a corded screwdriver -- the more power the better.
- This took me about three hours to complete, but I've done this a few times. ;) Overall you'll probably spend more time caulking and painting than building!
I'm off to get the materials for the other side! Now that I finished this one up I'm super excited to get them both done. The other side has a couple additional cut outs but shouldn't be too bad.
Now the question we're going back and forth on...what color to paint them? I'm not going to stain, so that's not an option:
We're considering three options -- paint them the same color of the fireplace walls (that we LOVE). Paint them white to tie in the fireplace surround, or paint them white and paint the back wall the dark color to tie in the fireplace walls. I'm leaning towards painting them the dark color, but you can never go wrong with white!
I may prime them and see what we think before deciding. That will give us an idea of how they'll look.
Here's an early before and an after for you (it looked better than this later on!):
And the after! (An in between after, but still pretty to me!) We LOVE it!!:
What's funny is this looks simpler to me than the furniture did! I'm going to keep the decor very clean on both sides. (We're keeping one of the consoles for the basement and selling the other one.)
You can see a few of my favorite built in projects by clicking on the link under these photos:
from
http://www.thriftydecorchick.com/2018/04/diy-bookcases-by-fireplace.html


No comments:
Post a Comment